Boosting React Native Performance with Lazy Loading and Code Splitting

Introduction:
In the world of mobile app development, the user experience is paramount. Users expect apps to be fast and responsive, regardless of the platform they’re on. In the realm of React Native, a popular framework for building cross-platform mobile applications, performance optimization is a critical aspect of development. Lazy loading and code splitting are two powerful techniques that can significantly enhance the performance of your React Native apps.
What are lazy loading and code splitting?
Before we dive into how to implement these techniques in React Native, let’s clarify what lazy loading and code splitting mean.

Lazy Loading:
Lazy loading is a strategy where you delay the loading of certain resources (e.g., components, modules, or images) until they are actually needed. This approach reduces the initial load time of your app because it only loads the essential components during the initial app startup. Additional components are loaded as the user interacts with the app.
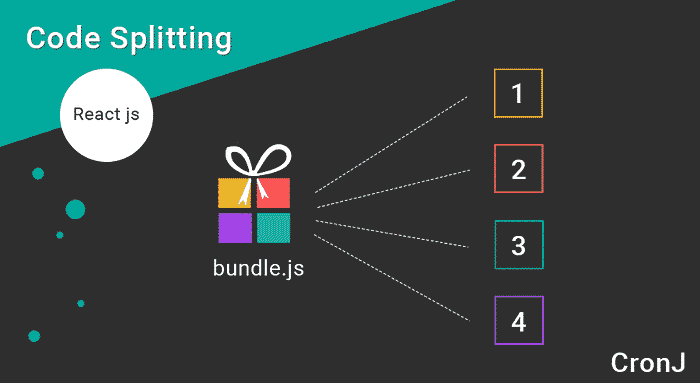
Code Splitting:
Code splitting is a technique that allows you to split your JavaScript code into smaller, more manageable chunks. Instead of bundling your entire app into a single JavaScript file, you divide it into multiple smaller files, or chunks. These chunks are loaded on demand, improving the app’s initial load time and overall performance.
Now that we understand the concepts, let’s explore how to implement lazy loading and code splitting in a React Native application.
Implementing Lazy Loading and Code Splitting in React Native
Step 1: Set Up a React Native Project
If you haven’t already, set up a new React Native project using Expo or the React Native CLI. For this example, I’ll assume you’re using the React Native CLI.
npx react-native init CodeSplittingExample
cd CodeSplittingExample
Step 2: Install React Navigation
We’ll use React Navigation for navigation and lazy loading. Install it by running:
npm install react-navigation react-navigation-stackStep 3: Create Screens
In this example, we’ll create two screens: a home screen and a profile screen. We’ll use lazy loading to load the profile screen only when the user navigates to it.
Create two files: HomeScreen.js and ProfileScreen.js.
HomeScreen.js:
import React from 'react';
import { View, Text, Button } from 'react-native';

const HomeScreen = ({ navigation }) => {
  return (
    <View>
      <Text>Home Screen</Text>
      <Button
        title="Go to Profile"
        onPress={() => navigation.navigate('Profile')}
      />
    </View>
  );
};

export default HomeScreen;
ProfileScreen.js:
import React from 'react';
import { View, Text }  from'react-native';

const ProfileScreen = () => {
  return (
    <View>
      <Text>Profile Screen</Text>
    </View>
  );
};

export default ProfileScreen;
Step 4: Set Up Navigation with Lazy Loading
In your App.js (or wherever you configure your navigation), set up navigation with lazy loading usingReact.lazy():
import React from 'react';
import { createAppContainer }  'from' react-navigation;
import { createStackNavigator } 'from' react-navigation-stack';

Lazyly load the screens
const HomeScreen = React.lazy(() => import('./HomeScreen'));
const ProfileScreen = React.lazy(() => import('./ProfileScreen'));

const AppNavigator = createStackNavigator(
  {
    Home: HomeScreen,
    Profile: ProfileScreen,
  },
  {
    initialRouteName: 'Home',
  }
);

const AppContainer = createAppContainer(AppNavigator);

const App = () => {
  return (
    <React.Suspense fallback={<Text>Loading...</Text>}>
      <AppContainer />
    </React.Suspense>
  );
};

export default App;
In the code above, we’re using React.lazy() to lazily load the HomeScreen and ProfileScreen components when they are needed during navigation. We wrap the AppContainer with React.Suspense to display a loading message while the components are being loaded.
Step 5: Run the App
Run your React Native app.
react-native run-android  or yarn android
# or
npx react-native run-ios or yarn ios
Now, when you launch the app, you’ll notice that the Home screen loads immediately. The Profile screen will only be loaded when you navigate to it, demonstrating lazy loading and code splitting in action.
Benefits of Lazy Loading and Code Splitting
Implementing lazy loading and code splitting in your React Native app offers several advantages:
- Faster Initial Load Time: By loading only the essential components and splitting your code, your app starts faster, providing a better user experience.
- Improved Performance: A reduced initial bundle size results in improved performance, especially on slower networks or older devices.
- Efficient Resource Utilization: Lazy loading ensures that resources are loaded only when they are needed, optimizing memory usage.
- Simplified Maintenance: Code splitting leads to smaller and more manageable code chunks, making your codebase easier to maintain.
Benefits of Lazy Loading and Code Splitting
Implementing lazy loading and code splitting in your React Native app offers several advantages:
- Faster Initial Load Time: By loading only the essential components and splitting your code, your app starts faster, providing a better user experience.
- Improved Performance: A reduced initial bundle size results in improved performance, especially on slower networks or older devices.Efficient Resource
- Utilization: Lazy loading ensures that resources are loaded only when they are needed, optimizing memory usage.
- Simplified Maintenance: Code splitting leads to smaller and more manageable code chunks, making your codebase easier to maintain.
Conclusion
Lazy loading and code splitting are essential techniques for enhancing the performance of your React Native applications. By employing these strategies, you can significantly improve initial load times, reduce resource consumption, and provide a smoother user experience. Embrace these techniques in your React Native projects and watch your app’s performance soar to new heights